
Happy October!
For some reason I feel so grown up doing my first DIY project!
For some reason I feel so grown up doing my first DIY project!
James' parents gave us the dresser that James used as a kid when we got our apartment. While there wasn't anything wrong with the dresser as it was, I thought a little freshening up couldn't hurt. My mom is an interior designer who I'm convinced could make a paper bag look like art. While I have ideas and have no clue what to do she understands and makes things happen!
This is the dresser my mom and dad have that I'm obsessed with. When I told her I wanted to do something similar to my new dresser she was confident we could make magic happen.
This is the dresser my mom and dad have that I'm obsessed with. When I told her I wanted to do something similar to my new dresser she was confident we could make magic happen.

Here's the dresser before we did anything to it.
Aside from needing to reattach some of the handles it wasn't in bad shape.
Aside from needing to reattach some of the handles it wasn't in bad shape.

Seriously y'all, if you haven't used this stuff it's the JAM!
If you've ever painted before you know how much of a hassle it can be. First you have to sand {no thanks}, then you have to prime {I'd rather not}, and finally you have to paint on numerous coats to get good coverage {yawn}.
This stuff takes away all those steps. No sanding, no priming, and only two coats for great coverage!
Since it's chalk paint and we didn't want it rubbing off there were a few more steps after painting, but if I can learn how to do it anyone can.

Side note: I learned the lighting in our apartment is AWFUL! I apologize for the pictures I was
toolazy excited to use my tripod.
Since we didn't have to prime or sand the first step was painting. Usually I get bored painting after about two paint strokes; however, painting with this stuff is, dare I say it... fun!
We put two coats on the dresser and the drawers and then we were done for the day to let the paint dry.

So... when James got home from work and saw phase I of the project he was a little less than thrilled. I was in love already, but the color was a lot brighter than he was anticipating. Thankfully he is a great sport and trusted the vision.
Day 2 consisted of lots and lots of waxing! Like I said above, Annie Sloan is chalk paint so wax has to be put on top so the paint doesn't chip.
First we put on clear wax: spread it on, let it dry, and wipe it off.
Then we sanded the edges to add character.
Lastly we put on [then wiped off] a darker wax to age it up.
The drawer on the left is before we added the dark wax and the right drawer is after:

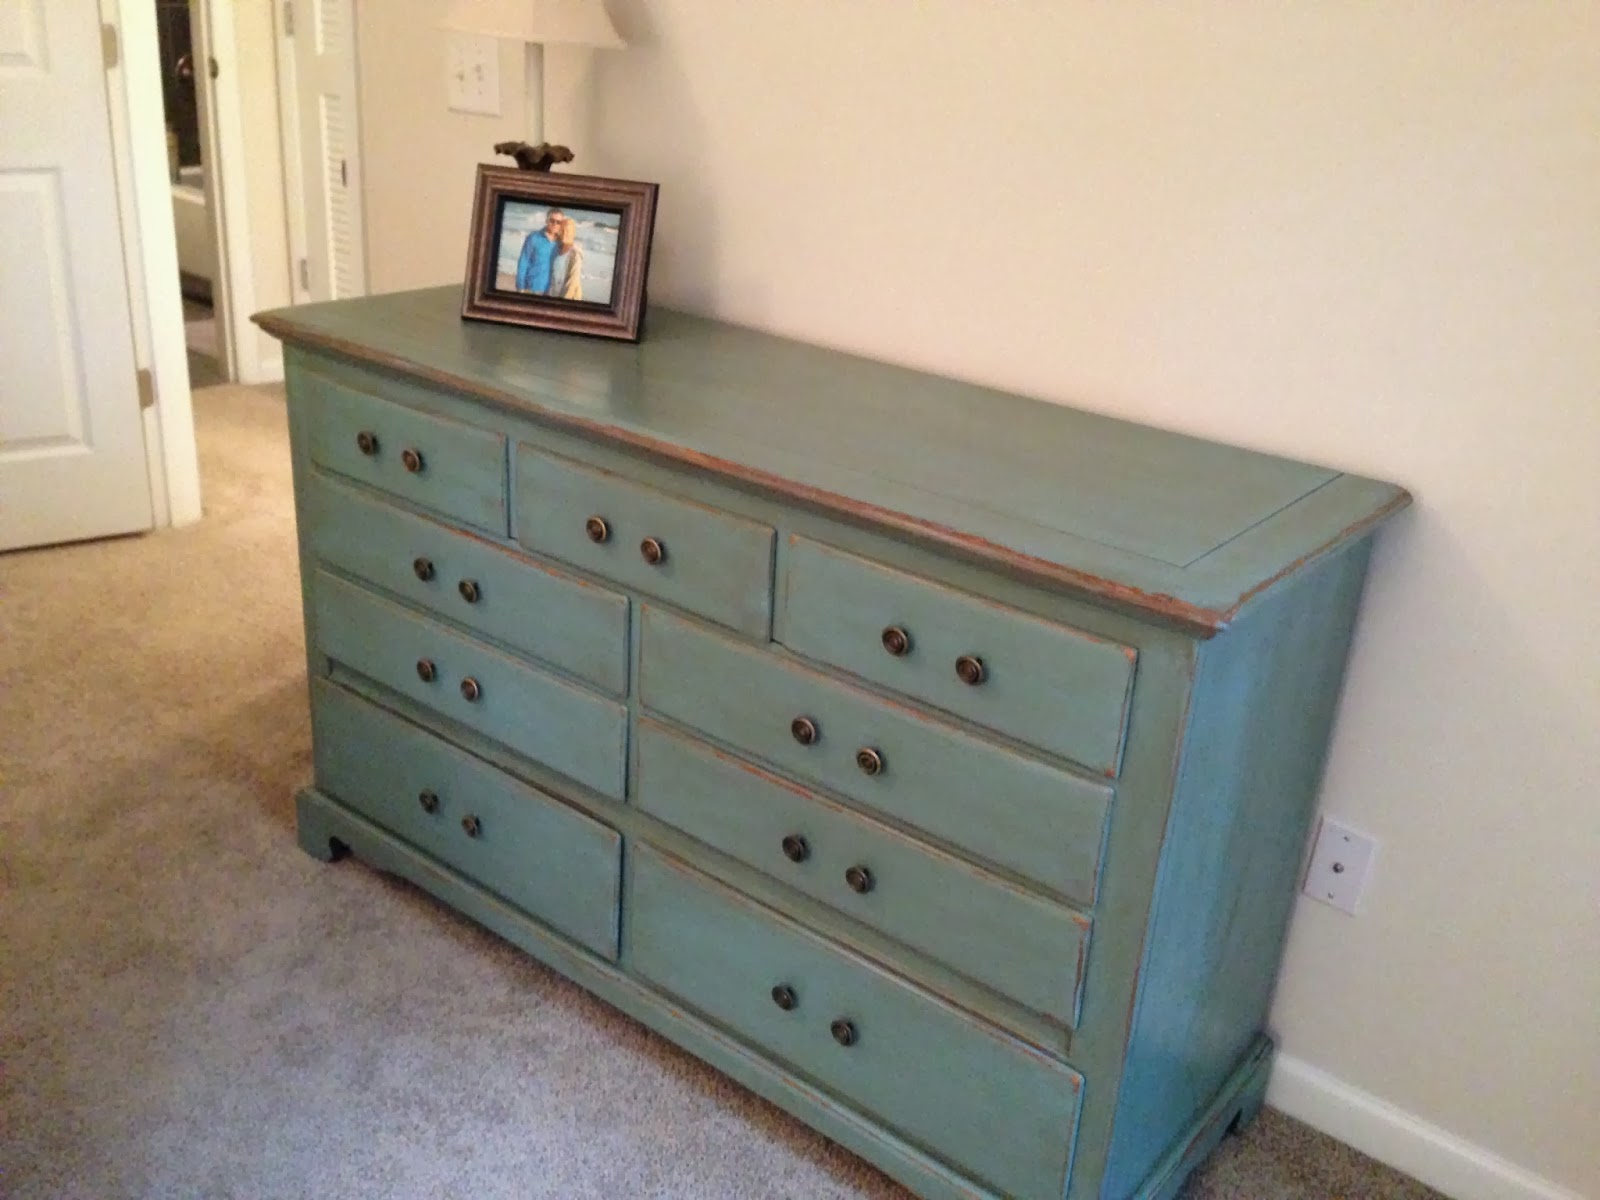
Ta Da!! It's almost finished!

We ordered these drawer pulls. Yup, I just said drawer pull... learned what those were two days ago! Now we're just waiting on them to come in from China.
Beautiful right?!?
I'm not sure if I've said this or not but, I LOVE our old dresser with a new look!
Can't wait to see how it looks when it's completely done!
If you've ever painted before you know how much of a hassle it can be. First you have to sand {no thanks}, then you have to prime {I'd rather not}, and finally you have to paint on numerous coats to get good coverage {yawn}.
This stuff takes away all those steps. No sanding, no priming, and only two coats for great coverage!
Since it's chalk paint and we didn't want it rubbing off there were a few more steps after painting, but if I can learn how to do it anyone can.

Side note: I learned the lighting in our apartment is AWFUL! I apologize for the pictures I was
too
Since we didn't have to prime or sand the first step was painting. Usually I get bored painting after about two paint strokes; however, painting with this stuff is, dare I say it... fun!
We put two coats on the dresser and the drawers and then we were done for the day to let the paint dry.
So... when James got home from work and saw phase I of the project he was a little less than thrilled. I was in love already, but the color was a lot brighter than he was anticipating. Thankfully he is a great sport and trusted the vision.
Day 2 consisted of lots and lots of waxing! Like I said above, Annie Sloan is chalk paint so wax has to be put on top so the paint doesn't chip.
First we put on clear wax: spread it on, let it dry, and wipe it off.
Then we sanded the edges to add character.
Lastly we put on [then wiped off] a darker wax to age it up.
The drawer on the left is before we added the dark wax and the right drawer is after:

Ta Da!! It's almost finished!
We ordered these drawer pulls. Yup, I just said drawer pull... learned what those were two days ago! Now we're just waiting on them to come in from China.
Beautiful right?!?
 |
| Etsy |
I'm not sure if I've said this or not but, I LOVE our old dresser with a new look!
Can't wait to see how it looks when it's completely done!
this is an AWESOME diy project!! I love the after so much.. I'm inspired :)
ReplyDeleteThat is an amazing transformation!
ReplyDeleteFound your blog through the Five on Friday and I LOVE this. I am trying to convince my husband to do this with an old dresser he got from his dad, but he puts sentimental value on EVERYTHING! haha Maybe one day! :)
ReplyDeleteStopping by from the link-up. I just re-did a dresser with Annie Sloan chalk paint, too, and it really is amazing stuff. Now I want to do more pieces asap! Love that robin's egg blue color! You did an awesome job. :)
ReplyDelete